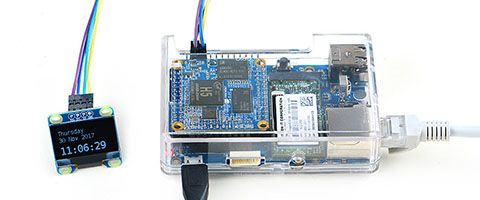
Une fois n'est pas coutume voici la programmation d'un NanoPi Neo Core2
PARTIE 1 : PRÉPARATION DE LA CARTE SD
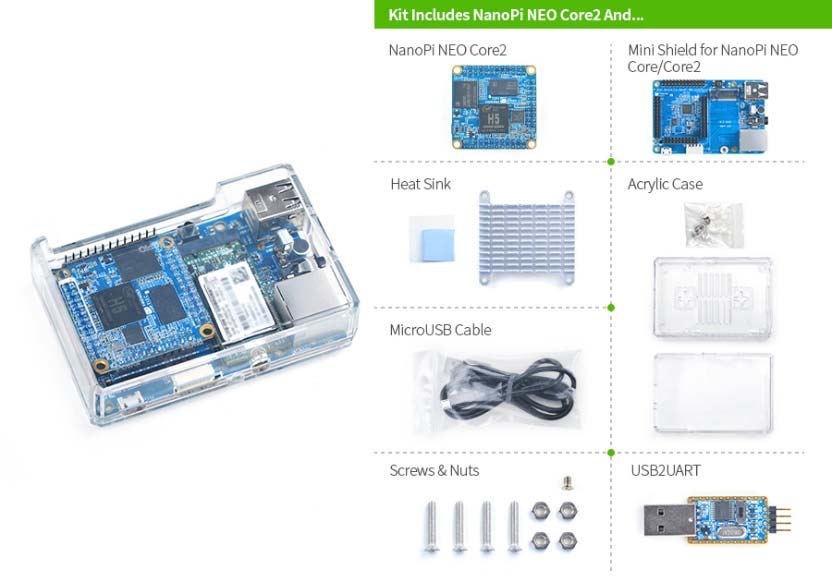
- Achat du matériel
Vous le trouverez ici : ...www.friendlyarm.com/
b.Téléchargement du fichier pour la carte SD (8 Go)
Prendre le fichier mentionné « eflasher »
c.Transférer le fichier *img sur la carte SD
à l’aide d’un logiciel Win32dikimager ou …..
d. Démarrer « Putty » à l’aide de l’IP du Système
loging : root

password : fa
Tapez les commandes :
$ sudo apt-get update && sudo apt-get upgrade -y

$ sudo reboot
e.Transfert à la mémoire emmc
Démarrer « Putty » à l’aide de l’IP du Système
Au prompt exécuter la commande :
$ eflasher
Prendre l’option 2 friendlycore-xenial puis « enter »
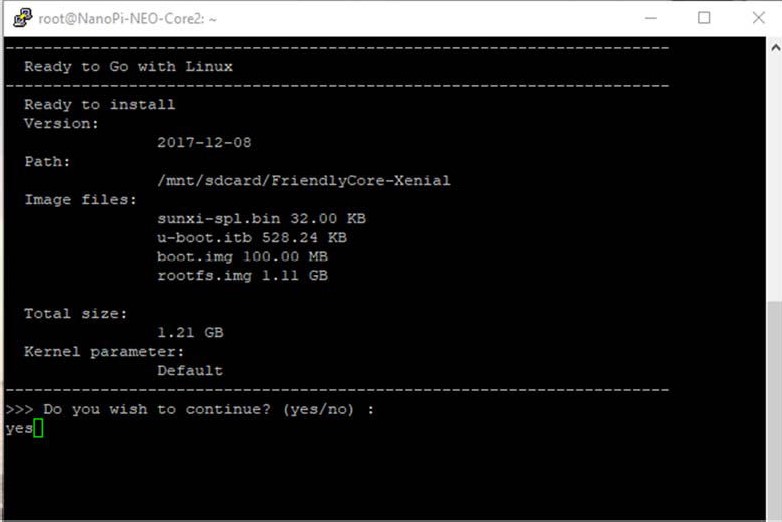
Répondre yes puis « enter »
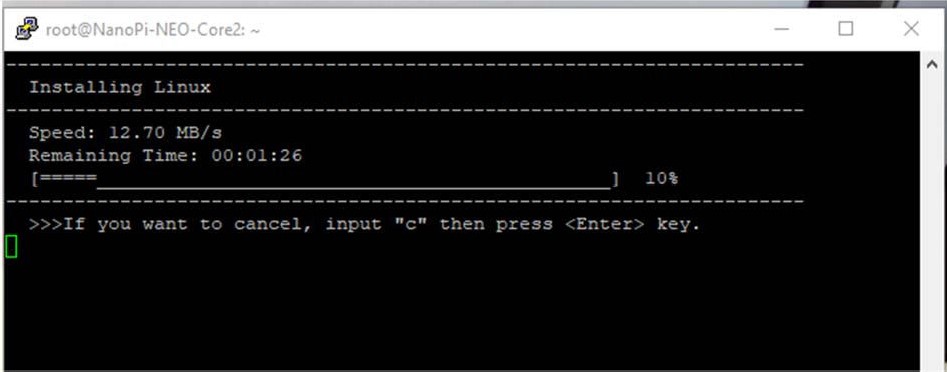
$ sudo reboot et enlever la carte SD
PARTIE 2 : PROGRAMMATION XFCE4
Au prompt exécuter les commandes :
$ sudo apt-get update && sudo apt-get upgrade -y
Aux demandes répondre 2 fois « N »
$ sudo reboot
Au prompt exécuter les commandes :
login : pi
password : pi
$ sudo apt-get install xorg lightdm xfce4 tango-icon-theme

$ sudo apt-get install gnome-icon-theme

$ sudo reboot
Au prompt exécuter les commandes :
login : pi
password : pi
Ensuite
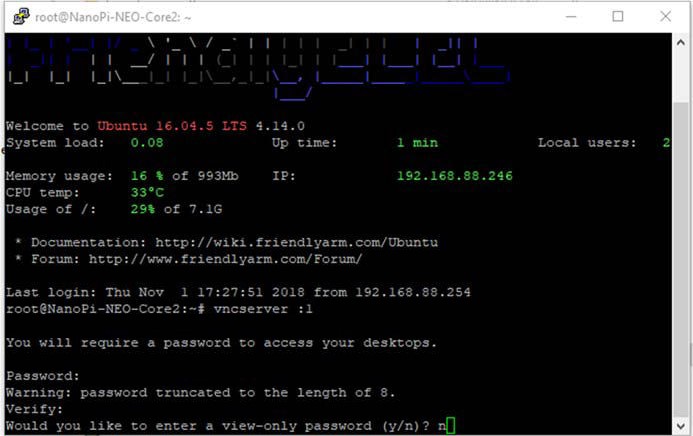
$ sudo apt-get install tightvncserver -y

$ sudo apt-get install tightvncserver xfonts-base -y

$ vncserver :1
Mot de passe :xxx
Verify : xxxx
Puis répondre « n »
Lancer VNCVIEWER à l’aide de l’IP Prendre le bureau par défaut
Dans la fenêtre du bureau apparait une erreur
Ouvrir un terminal et entre la commande suivante :
$ sudo chmod 755 /home/pi/.cache/*.*
Puis dans un terminal :
$ sudo npi-config
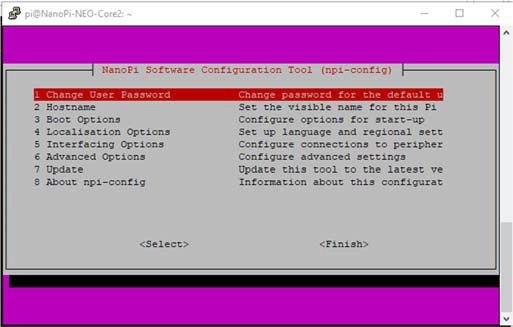
Choisir les options souhaitées : Wifi , langue, ….
Puis :
$ sudo apt-get install mousepad -y

$ sudo apt-get install screen

$ sudo apt-get install g++ -y

$ sudo reboot
Au prompt exécuter les commandes :
login : root
password : fa
$ vncserver :1
Mot de passe : xxx
Verify : xxxx
Puis répondre « n »
$ sudo nano /etc/systemd/system/vncserver@.service
Avec le contenu suivant :
[Unit]
Description=Service de bureau à distance (VNC)
After=syslog.target network.target
[Service]
Type=forking User=pi PAMName=login
PIDFile=/home/pi/.vnc/%H:%i.pid
ExecStartPre=-/usr/bin/vncserver -kill :%i > /dev/null 2>&1
ExecStart=/usr/bin/vncserver -depth 24 -geometry 1600x1000 :%i
ExecStop=/usr/bin/vncserver -kill :%i
[Install]
WantedBy=multi-user.target
$ sudo systemctl daemon-reload && sudo systemctl enable vncserver@1.service

$ sudo chmod 777 /etc/systemd/system/vncserver@.service

$ sudo reboot
PARTIE 2 : INSTALLATION MMDVMHost
Démarrer « Putty » à l’aide de l’IP du Système
Au prompt exécuter les commandes :
login : pi
$ sudo mkdir [Applications (ou autre modifié le mmdvmhost en conséquence)]

$ cd Applications

$ sudo git clone https://github.com/g4klx/MMDVMHost.git

$ cd MMDVMHost

$ sudo make

$ sudo nano /lib/systemd/system/mmdvmhost.service
[Unit]
Description=MMDVM Host Service
After=syslog.target network.target
[Service]
User=root
WorkingDirectory=/home/pi/Applications/MMDVMHost
ExecStart=/usr/bin/screen -S MMDVMHost -D -m
/home/pi/Applications/MMDVMHost/MMDVMHost /home/pi/MMDVM.ini ExecStop=/usr/bin/screen -S MMDVMHost -X quit
[Install]
WantedBy=multi-user.target
$ sudo chmod 755 /lib/systemd/system/mmdvmhost.service

$ cd /etc

$ sudo ln -s /lib/systemd/system/mmdvmhost.service

/etc/systemd/system/mmdvmhost.service

$ sudo systemctl daemon-reload

$ sudo reboot
Lancer VNCviewer
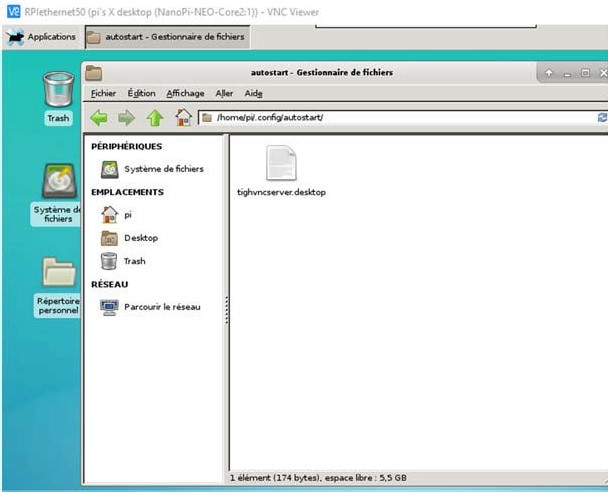
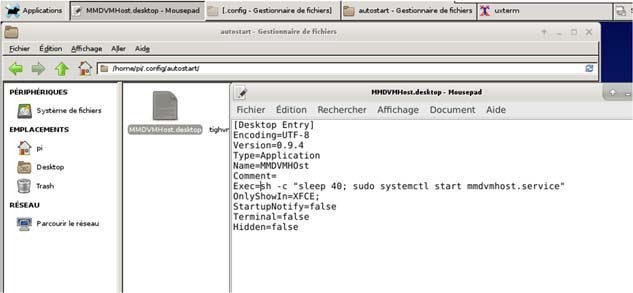
Préparer les « autostart »
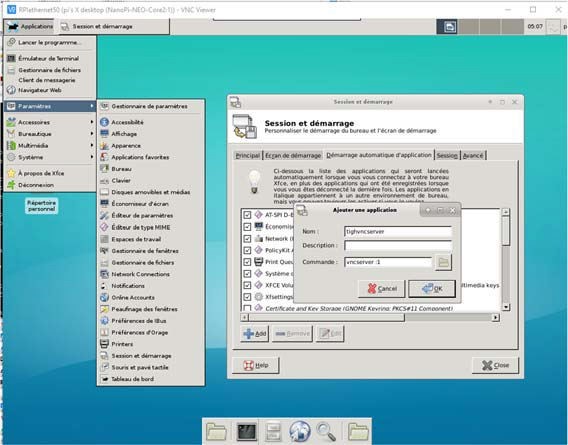
Faire « Ctrl H » pour voir fichier caché
PARTIE 3 : INSTALLATION RAMDISK/MMDVM.ini
Ouvrir un terminal « Putty »
login : pi
password : pi
Au prompt exécuter les commandes :
$ cd /

$ sudo mkdir /ramdisk

$ sudo nano /etc/fstab ajouter à la fin

$ tmpfs /ramdisk tmpfs nodev,nosuid,size=10M 0 0

$ sudo mount -a

$ cd /home/pi

$ sudo nano MMDVM.ini
[General]
Callsign=F****
Id=2******
Timeout=240
Duplex=1
# ModeHang=10
RFModeHang=300
NetModeHang=300
Display=Nextion
Daemon=0
[Info]
RXFrequency=434775000
TXFrequency=439775000
Power=1
Latitude=0.00000
Longitude=0.00000
Height=0
Location=
Description=Multi-Mode
Repeater URL=www.google.co.uk
[Log]
# Logging levels, 0=No logging
DisplayLevel=1
FileLevel=1
FilePath=/ramdisk
FileRoot=MMDVM
[CW Id]
Enable=0
Time=10
# Callsign=
[DMR Id Lookup]
File=/DMRIds.dat
Time=24
[NXDN Id Lookup]
File=/home/pi/NXDN.csv
Time=24
[Modem]
# Port=/dev/ttyACM0
Port=/dev/ttyUSB0
# Port=\\.\COM3
Protocol=uart
# Address=0x22
TXInvert=1
RXInvert=0
PTTInvert=0
TXDelay=100
RXOffset=-250
TXOffset=-250
DMRDelay=0
RXLevel=50
TXLevel=52
RXDCOffset=0
TXDCOffset=0
RFLevel=100
# CWIdTXLevel=50
# D-StarTXLevel=50
# DMRTXLevel=50
# YSFTXLevel=50
# P25TXLevel=50
# NXDNTXLevel=50
# POCSAGTXLevel=50
RSSIMappingFile=RSSI.dat
Trace=0
Debug=0
[Transparent Data]
Enable=0
RemoteAddress=127.0.0.1
RemotePort=40094
LocalPort=40095
[UMP]
Enable=0
# Port=\\.\COM4
Port=/dev/ttyACM1
[D-Star]
Enable=0
Module=B
SelfOnly=0
AckReply=1
AckTime=750
ErrorReply=1
RemoteGateway=0
# ModeHang=10
[DMR]
Enable=1
Beacons=0
BeaconInterval=60
BeaconDuration=3
ColorCode=1
SelfOnly=0
EmbeddedLCOnly=0
DumpTAData=1
# Prefixes=234,235
# Slot1TGWhiteList=
# Slot2TGWhiteList=
CallHang=3
TXHang=4
# ModeHang=10
[System Fusion]
Enable=0
LowDeviation=0
SelfOnly=0
#DGID=1
RemoteGateway=0
# ModeHang=10
[P25]
Enable=0
NAC=293
SelfOnly=0
OverrideUIDCheck=0
RemoteGateway=0
# ModeHang=10
[NXDN]
Enable=0 RAN=1
SelfOnly=0
RemoteGateway=0
# ModeHang=10
[POCSAG]
Enable=0
Frequency=439987500
[D-Star Network]
Enable=1 GatewayAddress=127.0.0.1
GatewayPort=20010
LocalPort=20011
# ModeHang=3 Debug=0
[DMR Network]
Enable=1 Address=44.131.4.1
Port=62031 Jitter=360
Local=62032
Password=passw0rd
# Options=
Slot1=1
Slot2=1
Debug=0
[System Fusion Network]
Enable=1
LocalAddress=127.0.0.1
LocalPort=3200
GatewayAddress=127.0.0.1
GatewayPort=4200
ModeHang=20
Debug=0
[P25 Network]
Enable=0
GatewayAddress=127.0.0.1
GatewayPort=42020
LocalPort=32010
# ModeHang=3 Debug=0
[NXDN Network]
Enable=1
LocalAddress=127.0.0.1
LocalPort=14021
GatewayAddress=127.0.0.1
GatewayPort=14020
ModeHang=20
Debug=0
[POCSAG Network]
Enable=0
LocalAddress=127.0.0.1
LocalPort=3800
GatewayAddress=127.0.0.1
GatewayPort=4800
# ModeHang=3
Debug=0
[TFT Serial]
# Port=modem
Port=/dev/ttyAMA0
Brightness=50
[HD44780]
Rows=4
Columns=20
# For basic HD44780 displays (4-bit connection)
# rs, strb, d0, d1, d2, d3
Pins=11,10,0,1,2,3
# Device address for I2C
I2CAddress=0x20
# PWM backlight
PWM=0
PWMPin=21
PWMBright=100
PWMDim=16
DisplayClock=1
UTC=0
[Nextion]
Port=modem
# Port=/dev/ttyUSB0
Brightness=50
DisplayClock=1
UTC=0
#Screen Layout: 0=G4KLX 2=ON7LDS
ScreenLayout=3
IdleBrightness=20
[OLED]
Type=3
Brightness=0
Invert=0
Scroll=1
[LCDproc]
Address=localhost
Port=13666
#LocalPort=13667
DimOnIdle=0
DisplayClock=1
UTC=0
$ sudo reboot
PARTIE 4 : INSTALLATION DASHBOARD
$ sudo apt-get update && sudo apt-get upgrade -y

$ sudo apt-get install apache2 -y

$ sudo apt-get install php* libapache2-mod-php* -y

$ sudo apt-get install libapache2-mod-php -y

$ sudo chown -R www-data:pi /var/www/html/

$ sudo chmod -R 770 /var/www/html/

$ cd /var/www/html/

$ rm *

$ git clone https://github.com/dg9vh/MMDVMHost-Dashboard.git

$ cd MMDVMHost-Dashboard

$ mv * /var/www/html/

$ cd ..

$ rm -rf MMDVMHost-Dashboard

$ sudo nano /etc/sudoers ajouter

$ www-data ALL=(ALL) NOPASSWD : ALL

$ cd config

$ sudo nano config.php
<?php
# This is an auto-generated config-file!
# Be careful, when manual editing this!
date_default_timezone_set('UTC');
define("MMDVMLOGPATH", "/ramdisk");
define("MMDVMLOGPREFIX", "MMDVM");
define("MMDVMINIPATH", "/home/pi/");
define("MMDVMINIFILENAME", "MMDVM.ini");
define("MMDVMHOSTPATH", "/home/pi/Applications/MMDVMHost");
define("ENABLEXTDLOOKUP", "on");
define("DMRIDDATPATH", "/home/pi/DMRIds.dat");
define("ENABLEYSFGATEWAY", "on");
define("YSFGATEWAYLOGPATH", "/home/pi/Applications/YSFClients/YSFGateway/");
define("YSFGATEWAYLOGPREFIX", "YSFGateway");
define("YSFGATEWAYINIPATH", "/home/pi/");
define("YSFGATEWAYINIFILENAME", "YSFGateway.ini");
define("YSFHOSTSPATH", "/home/pi/Applications/YSFClients/YSFGateway");
define("YSFHOSTSFILENAME", "YSFHosts.txt");
define("ENABLENXDNGATEWAY", "on");
define("NXDNGATEWAYLOGPATH", "/home/pi/Applications/NXDNClients/NXDNGateway");
define("NXDNGATEWAYLOGPREFIX", "NXDGateway");
define("NXDNHOSTPATH", "/home/pi/Applications/NXDNClients/NXDNGateway");
define("NXDNHOSTFILENAME", "NXDNHosts.txt");
define("NXDNGATEWAYINIPATH", "/home/pi/");
define("NXDNGATEWAYINIFILENAME", "NXDNGateway.ini");
define("LINKLOGPATH", "/var/log/opendv");
define("IRCDDBGATEWAY", "ircddbgateway");
define("TIMEZONE", "Europe/Paris");
define("LOGO", "on");
define("DMRPLUSLOGO", "");
define("BRANDMEISTERLOGO", "");
define("REFRESHAFTER", "30");
define("SHOWPROGRESSBARS", "on");
define("TEMPERATUREALERT", "on");
define("TEMPERATUREHIGHLEVEL", "65");
define("ENABLENETWORKSWITCHING", "off");
define("SWITCHNETWORKUSER", "");
define("SWITCHNETWORKPW", "");
define("ENABLEMANAGEMENT", "on");
define("VIEWLOGUSER", "");
define("VIEWLOGPW", "");
define("HALTUSER", "");
define("HALTPW", "");
define("REBOOTUSER", "");
define("REBOOTPW", "");
define("RESTARTUSER", "");
define("RESTARTPW", "");
define("REBOOTMMDVM", "sudo systemctl restart mmdvmhost.service");
define("REBOOTSYS", "sudo reboot");
define("HALTSYS", "sudo halt"); define("POWERONLINEPIN", "");
define("POWERONLINESTATE", "");
define("SHOWQRZ", "on"); define("SHOWPROGRESSBARS", true);
define("LHLINES", 40);
?>
$ cd ..

$ sudo mv setup.php setup.old
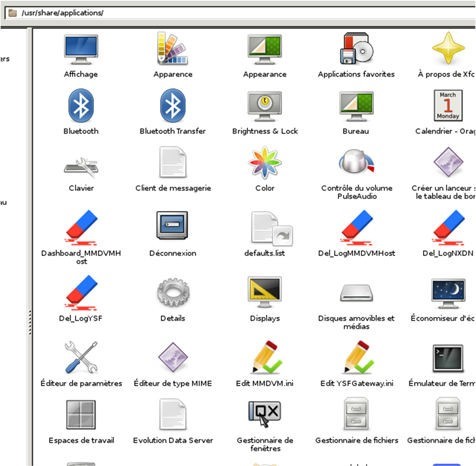
PARTIE 5 : MISE EN PLACE DES COMMANDES
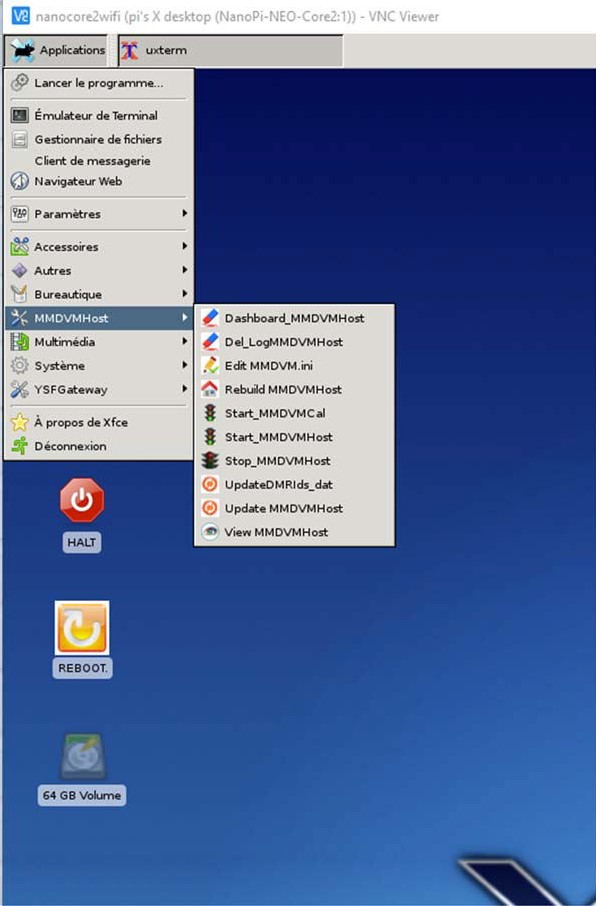
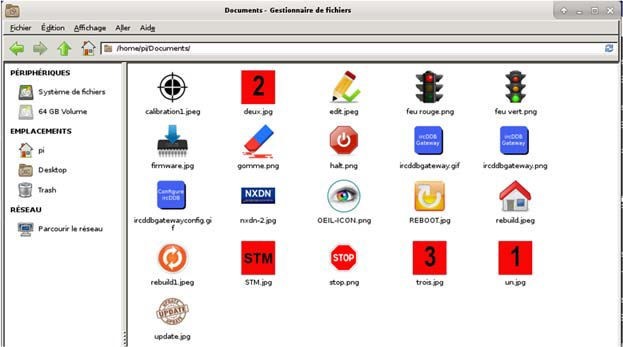
MISE EN PLACE DES ICôNES :
Avec winscp tranférer les icônes dans par exemple : /home /pi/Documents
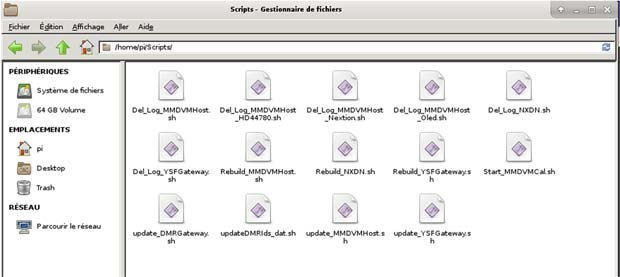
Mettre les Scripts dans /home/pi/Scripts
Avec « winscp tranférer » ou écrire les scripts dans : /home /pi/Scripts
Donner les droits
$ sudo chmod 755 /home/pi/Scripts

$ sudo chmod 755 /home/pi/Scripts/*.*
Mise en place des commandes :
Donner les droits et faire ses « *.desktop »
$ sudo chmod 755 /usr/share/applications/
Avec « winscp tranférer » ou écrire les commandes dans : /usr/share/applications/
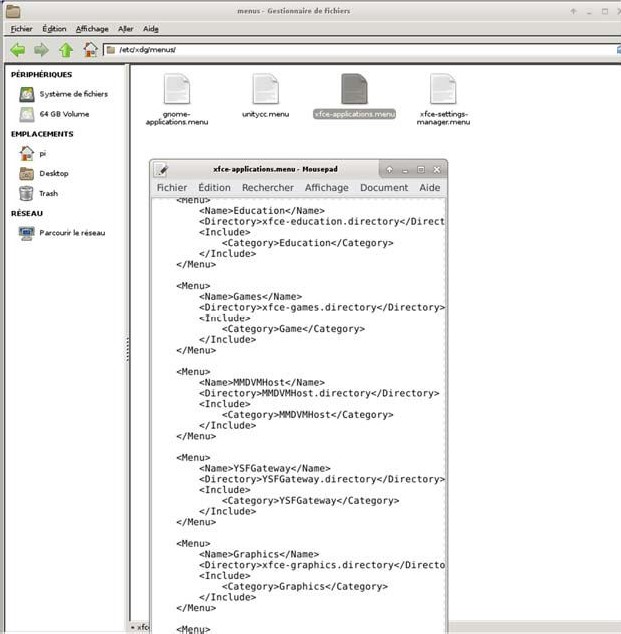
Mise en place des « directory »
Donner les droits et faire ses «*. directory »
$ sudo chmod 755 /usr/share/desktop‐directories/
Avec « winscp tranférer » ou écrire les « directory » dans : /usr/share/desktop‐directories/

Mise en place des « groupes »
Donner les droits et faire ses « groupes » : MMDVMHOst et……………
WIFI NANO CORE 2
1. Ouvrir un terminal
$ sudo su
2. Liste
$ nmcli dev
3. start wifi
$ nmcli r wifi on
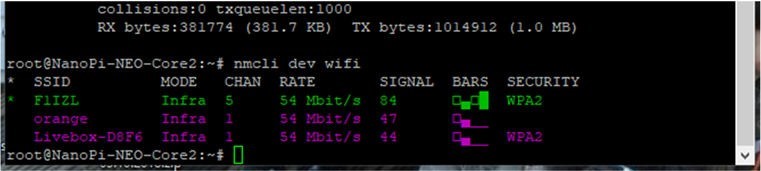
4. Sources Wifi
$ nmcli dev wifi
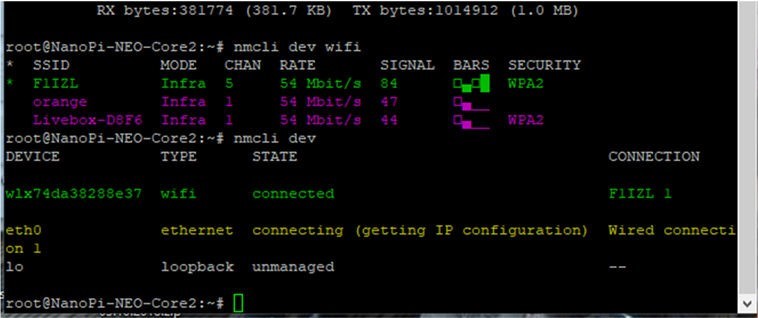
5. Connexions
$ ifconfig
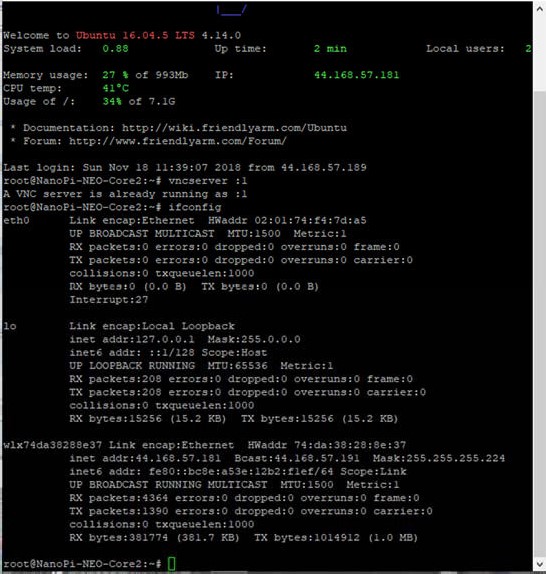
À la position : ⇒ W1x74da38288e37 ... la connection de F1IZL
$ nmcli dev wifi connect "SSID" password "PASSWORD" ifname wlx74da38288e37
Cet article au format PDF
NANO-PI-CORE 2
Image vignette du site www.friendlyarm.com/
Licencié Harec depuis 1990, après une pause de quelques années, j'ai renouvelé mon intérêt pour la radio, je suis particulièrement actif en HF, appréciant le FT8, les contest et la chasse au Dx. Depuis 2021, je suis président de la section de Liège et administrateur du site Internet www.on5vl.org. Passionné d'informatique, je suis convaincu que le monde des radioamateurs doit évoluer avec les avancées technologiques, notamment avec l'émergence de l'IA dans nos shack.